A quick rant about my Braun Slide Scanner 4000.
A few years ago I purchased a dedicated $1 600 Braun Slide scanner, which I used for several thousand slides before it broke. It was doing excellent work where I spent many hours scanning in precious images of biodiversity for free. I loved that I could rack up 100 slides at a time in a carousel, and leave it to run. I thought the software that came with it was somewhat lacking though. One day though, a slide caused it to jam, and try as I might I couldn't free it. I had to take it to a local photographic repair company for repairs where I was charged four times what the local repair man charged them, to have it taken to him. After repairs the scan feeder would only move backwards through the slides - inconsistently. Its been nearly a year since I personally took it through to Holland from South Africa via France and Israel, where I met a wonderful person on the train who promised to post it to Germany. A year later it is still at the Braun Factory for repairs. We're at a bit of a stand-off, because I missioned to get my scanner to them, and yet they are still insisting on payment. I would have hoped for better from what I believed to be a credible German company.
 |
| Erica cygnea - one of 1100 slides scanned in by my Braun Slidescan 4000 from Keith Kirsten's Erica collection |
 |
| A fun picture of an old school geezer with Erica daphniflora |
Flatbed scanning: The Canoscan 8800F, A robust workhorse!
This article however is focused on flatbed scanning, particularly for scanning 3-D objects, particularly plants. My mainstay has been my Canoscan 8800F. This has been an incredible workhorse with which I have scanned in hundreds of squashed plant specimens, carted it around the country on dusty rugged dirt roads in the Crazy Daisy on field trips, and dropped it at least once off the table where I had precariously balanced it - and yet still she lives!
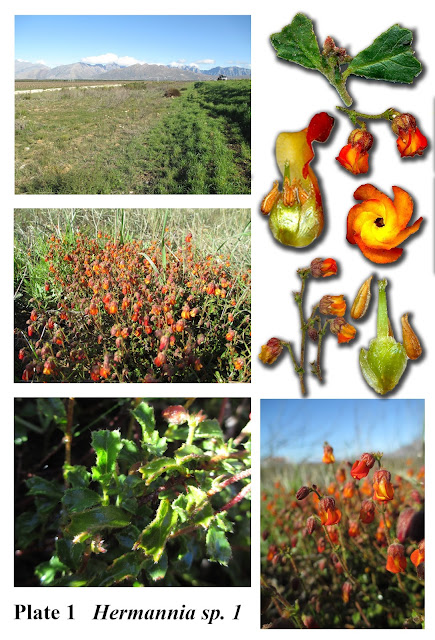
I've been scanning in live specimens, dissecting them, and arranging the pieces. The results have been close to spectacular (Fig. 1). At full resolution, or 4800 DPI, It is possible to see nearly every hair and gland on a leaf or flower (Fig. 2). I have come up with the workflow that allows me to remove the background and put together a plate in about an hour. However, it's been three years since Canon brought out the affordable Canoscan 9000F flatbed scanner. One would have thought that by now technology would have improved somewhat. What would that wish list include?
 |
| Fig. 1. A composite of Hermannia concinnifolia |
 |
| Fig. 2. A close-up of a petal showing the hairs on the claw |
More Speed!
On the top of the priority list would surely be USB 3.0 connectivity, available since 2008! Scanners are notoriously slow at high resolution, churning out hundreds of megabytes. The data needs to be acquired by the scanning device, processed locally, then pumped through to the computer for storage. An inch of scanning at 4800 DPI probably takes one minute. It takes 22 seconds to initialize and calibrate the scanner at this resolution, finishing the task in 1 min 25 seconds. They all tout the warm-up time being zero for LED lamps, but what about this not insignificant initialization time?? For a several inch long object, this becomes very significant.
I feared I was alone in ranting about this, but I see that
this photoreview website states that:"
Although the CanoScan 9000F boasts an 'instant' warm-up time, it actually takes roughly five seconds before it starts working after one of the direct buttons is pressed. This is because each scan involves capturing a preview which includes preliminary adjustments".
The warmup time at a lowly 300DPI is still six seconds for the initial calibration. Thereafter it is 3 seconds. A 300 DPI scan is four seconds. I notice on the Canon 9000F it touts a blistering 7 second speed to scan in a full A4 colour page at 300DPI. In other words exactly the same blistering speed as the 8800F on the shelves in 2007 already. Five years later still the same unimproved blistering speed!
Higher resolution
Although 4800DPI scans are great, they just can't quite resolve the smaller hairs and details of plants. 9600 DPI is only double this. We should be pushing for greater scan resolutions, though arguably if one wants that much detail - get a microscope!
Maximum scan size
Additionally, there is a maximum size of 21000 x 30 000 pixels which equates to 4.3 inches x 6.25 inches. I'm sure there is a perfectly good reason for this limit, but I would love to know what it is. Fortunately a quick Google search reveals that the
Canon 9000F mark II increases this maximum resolution to 50 000 x 50 000. A welcome change in size.
3-D scanning.
It is said that for 3-D scanning, equivalent to using the scanner as a camera, a good depth of focus is needed.
David Walker reveals in his
post that there are two kinds of consumer scanner sensors: CIS (Contact Image Sensor) and the CCD (Charge Coupled Device) designs. CIS, a relatively recent innovation is more compact and energy efficient with the sensor lying very close to the glass. Additionally they are relatively cheap as they dispense with the lens, mirror, lamp, and the A/D chip. The CCD on the other hand, as
Carl McMillan shows, gives far superior depth of field however, about one inch of useable DOF. For 3-D scanning we clearly need a maximum depth of field, so CCD is the route we need to take. This means that for 3-D scanning, a thin scanner like the LIDE series is NOT what you want.
Light fall-off
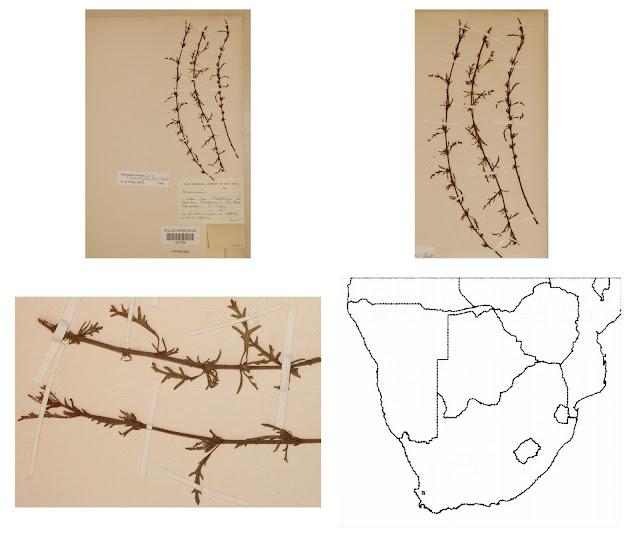
Light fall-off is the best term I can find for the rate of reduction in light from the light source to the object, and back to the sensor. Now although light dissipates at a known rate from a point source, this is not the case for a focused source like a torch. This is something that LED's natively do. So why do my objects fade into black so quickly. This has a number of negative impacts. I lose a significant amount of the plant into the background. Furthermore it becomes increasingly difficult to demarcate the black background from the object, leading to the most horrible artefacts where the magic one has decided to include the object in the background, and thus remove it. Is this necessary? Can a future model of scanner provider greater depth of field and a greater penetration of light?
 |
A demonstration of the artifacts of light fall-off on Hertia alata.
Note the distant foliage that could not be seperated from the background
so was effectively cut out. |
Shadows
The shadows thrown by the plant onto the background screen are the absolute bain of my existance. I spend maybe half an hour instead of 3 minutes isolating a plant from the background when there are significant shadows. Putting the sensor closer to the lightsource may help reduce the shadows. Otherwise is there some clever software or hardware solution??
 |
So one squashes the plant and provides a white background to avoid light fall-off,
only to encounter the dreaded shadows that take an ETERNITY to isolate from the plant. |
Passive scanning
Why does no scanner thus far allow for passive scanning, or at least a customisable light source brightness? The rationale is that for artistic and 3-D scanning, it would be nice to use natural or other light sources. Now although LEDs are arguably not dimmable, using rapid switching technology should allow one to customise the effective brightness of the LEDs. Combined with a customisable passive scanning option, this would allow the scanner to do a quick scan without lights, perhaps a second active scan, and then using that information provided user tunable options to light the 3-D object optimally.
Automatic compositing
Say you have a document or object that doesn't fit on the scanner. Simply scan one part of it, click on the "scan next portion" button. Move it, leaving an overlapping section. And scan again. The scanner automatically stitches them together based on overlapping pixels. Theoretically! Why does no scanner include this as a standard feature?! Grrr.
Black Background Technique
A user recommends using a black cloth to remove the background. I experimented with numerous cloths trying to find The most matt one, including velvet, but found that invariably dust or reflections would wreak havoc with my black background. Finally I settled on a box which I place on the scanner. My current box has a depth of about 40 cm, and even the dark red colour of the box does not show in my scans. This has the added advantage of not disturbing carefully placed arrangements on the page, like a cloth would do., including velvet.
JPEG XR Format
Oh how I lament the fact that no cameras save as JPEG XR -but that is a topic for another blog. The JPEG XR codecs have been out since 2009 and it is supported by most good image software such as Irfanview and Photoshop. There are a whole bunch of advantages to saving images using JPEG XR as it offers numerous advantages over JPEG including: better compression; lossless compression (with, tiled structure support (so that only a portion of the image needs to be decoded); greater colour accuracy including 24-Bit RGB (true colour) and even 48-Bit integer RGB (deep colour); greater HDR support; greyscale and multi-channel colour codings (so one should be able to store the infra-red information); and transparency support through an alpha channel. In a nutshell, JPEG XR provides better image quality at less than half the file size with a bunch of useful image options, and lossless compression at 2.5x smaller file sizes than the original data.
So come on Scanner companies. Its been 5 years since we've had any major strides in the consumer scanner field, and no, upgrading the software on the 9000F and calling it mark II does not count! Here are a bunch of obvious milestones that could (read should) be implemented in a nearby future model. USB 3.0, easy. JPEG XR, just a codec implementation. Passive scanning - switch off the LED's for a start. And surely you can be more honest about the start-up time, and find ways to reduce that, like not calibrating it every time you scan at the same resolution!
That list again:
1) More speed including quicker start times, quicker scan speed, and quicker transfer speed (USB 3.0).
2) Greater depth of field (probably not so easy to implement).
3) Automatic stitching option for large objects.
4) Passive or even better, adjustable light acquisition.
5) Dealing with shadows cast by 3-D objects
6) Better compression - implementation of JPEG XR.
7) Higher resolution - have we really maxed out at 9600DPI native resolution?
Posted 23 Oct 2013 by
TNB
Twitter: @TNBLoganist
email: capebio (at) gmail.com


